Setting up a Wireless Access Point - Bridge Method (internet over wired Ethernet)
In this tutorial we will show you how to setup your Raspberry Pi as a WiFi Access Point and how to bridge the access point to your wired internet connection. If you are looking to connect your access point to the internet over a wifi connection then check out this tutorial here. Let’s start by making sure our Raspbian installation is fully up-to-date sudo apt-get update sudo apt-get upgrade Then we can install the software required for this tutorial, hostapd and bridge-utils sudo apt-get install hostapd bridge-utils Next we need to stop our Ethernet interface and our WiFi interface from being assigned an IP address. This is because the bridge will act as a network interface that has its own IP address, and it’ll manage the connections over Ethernet and WiFi. You will need to find out the name of
Official Raspberry Pi reseller. The ultimate Raspberry Pi & maker superstore with all of the biggest brands under one roof. Raspberry Pi Zero stockist. Next Day delivery available.
In this tutorial we will show you how to setup your Raspberry Pi as a WiFi Access Point and how to bridge the access point to your wired internet connection. If you are looking to connect your access point to the internet over a wifi connection then check out this tutorial here.
Let’s start by making sure our Raspbian installation is fully up-to-date
sudo apt-get update
sudo apt-get upgrade
Then we can install the software required for this tutorial, hostapd and bridge-utils
sudo apt-get install hostapd bridge-utils
Next we need to stop our Ethernet interface and our WiFi interface from being assigned an IP address. This is because the bridge will act as a network interface that has its own IP address, and it’ll manage the connections over Ethernet and WiFi.
You will need to find out the name of these interfaces, by typing the following command:
ifconfig
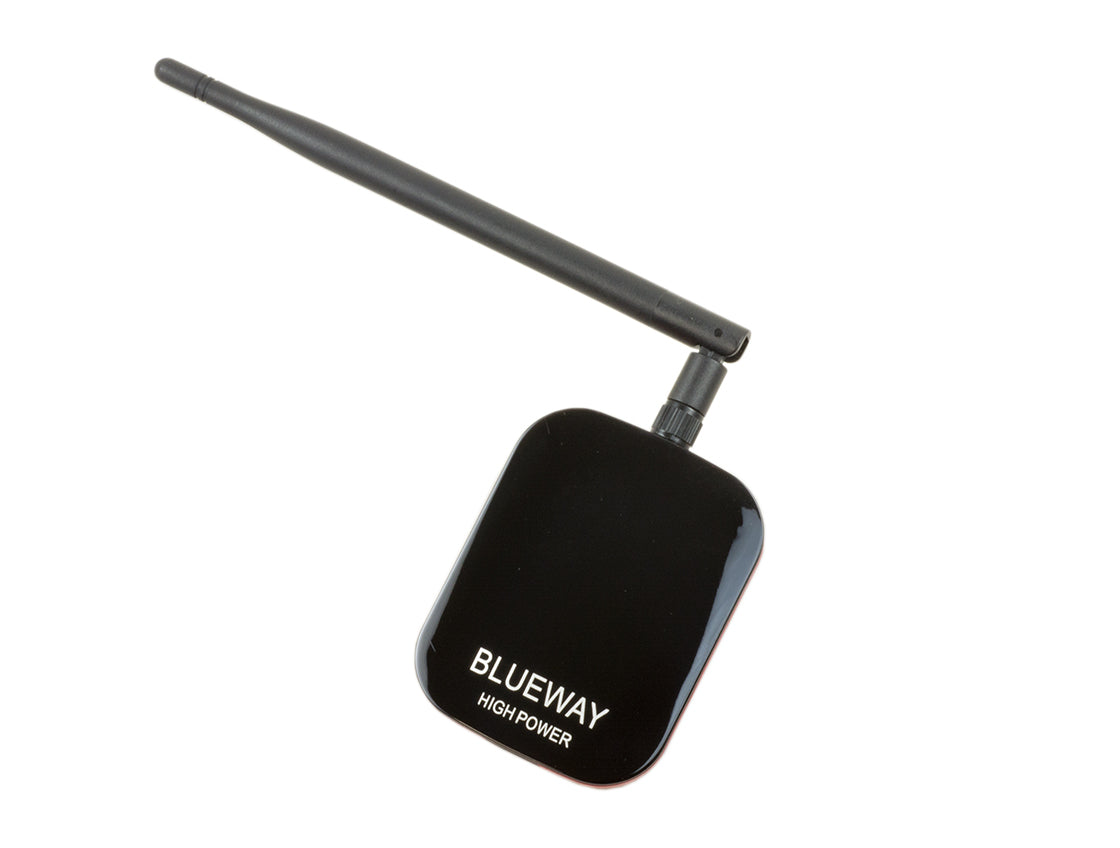
You should see a list of network interfaces. Your wired connection will probably be eth0 and your wireless connection will probably be wlan0. If you are using a Pi that has built in WiFi, but want to use a USB WiFi dongle, for better range or performance, then you should see it listed as well, and it’ll probably be called wlan1. You can see in our example we have two WiFi interfaces. We are going to use wlan1, which is our Ultra Long Range High Gain WiFi Dongle.
Now we know the names of our interfaces, eth0 and wlan1 we can edit the dhcpd config file:
sudo nano /etc/dhcpcd.conf
and add the following lines at the bottom of the file (if you have other network interfaces defined in this file, then make sure the following lines are placed BEFORE their definitions.)
denyinterfaces wlan1
denyinterfaces eth0
Now we can create the bridge
sudo brctl addbr br0
With the bridge created, we can then connect our wired Ethernet connection to it, eth0:
sudo brctl addif br0 eth0
Now we need to edit our network interfaces file:
sudo nano /etc/network/interfaces
and add the bridging information:
# Bridge setup
auto br0
iface br0 inet manual
bridge_ports eth0 wlan1
With the bridge all setup, it’s time to setup our WiFi interface as an Access Point.
Start by editing the hostapd config file:
sudo nano /etc/hostapd/hostapd.conf
and the following block:
interface=wlan1
bridge=br0
driver=nl80211
ssid=RPi_AP
hw_mode=g
channel=7
wmm_enabled=0
macaddr_acl=0
auth_algs=1
ignore_broadcast_ssid=0
wpa=2
wpa_passphrase=SecurePassword
wpa_key_mgmt=WPA-PSK
wpa_pairwise=TKIP
rsn_pairwise=CCMP
Change the following lines as required:
ssid= - This is the name of the network you see when searching for WiFi networks
wpa_passphrase= - This is the password required to connect to the WiFi network (please note, quotes should NOT be used around the password and must be longer than 8 characters, but less than 64)
Once you’ve added that configuration, we need to tell hostapd to use it by default. To do this we need to edit the hostapd defaults file:
sudo nano /etc/default/hostapd
Update the line #DAEMON_CONF to:
DAEMON_CONF=/etc/hostapd/hostapd.conf
Take note that the # has been removed!
And that’s it! Reboot your raspberry pi and you should then be able to see a network called “RPi_AP†(or whatever you changed it to) and connect to it with the password you used in the configuration file.

Router Bridge, Connect Two Routers – Router Behind Router
【Why this Universal Ethernet to wifi wireless adapter 】1.Network Printer need a wifi adapter for printer to connect wifi 2.Voip phone need wifi to Lan

Wireless Bridge WiFi to Ethernet Adapter - 1200Mbps Universal WiFi to Ethernet Converter 5G/2.4G Dual Band WiFi to Wired Ethernet Adapter Wireless
What is a wireless distribution system and how does it work with my Nighthawk router? - NETGEAR Support
How to Connect a Wireless Access Point to a Wired Network – Expert Network Consultant
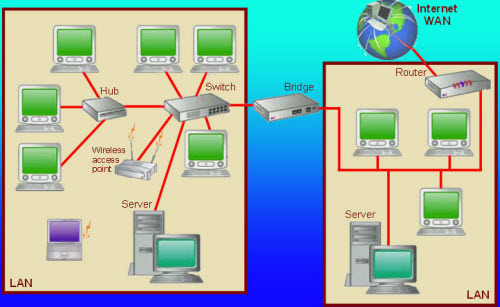
LAN, How to Set Up LAN Network? – Router Switch Blog
Point-to-point Wi-Fi bridging between buildings—the cheap and easy way
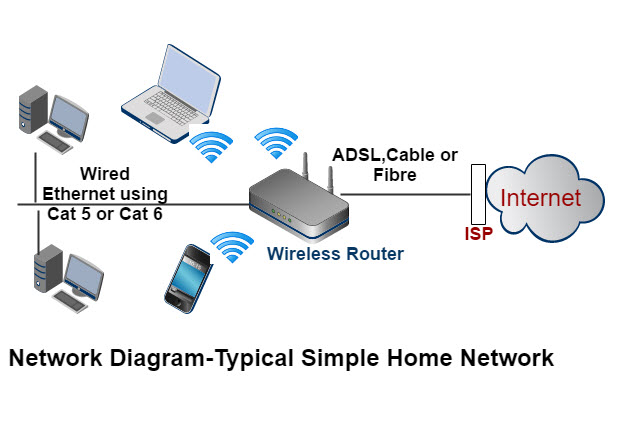
How to Extend a Home Network

Access Points and Wireless LAN Controllers Explained

Modem, Router, Switch, and Access Point: What's the Difference?
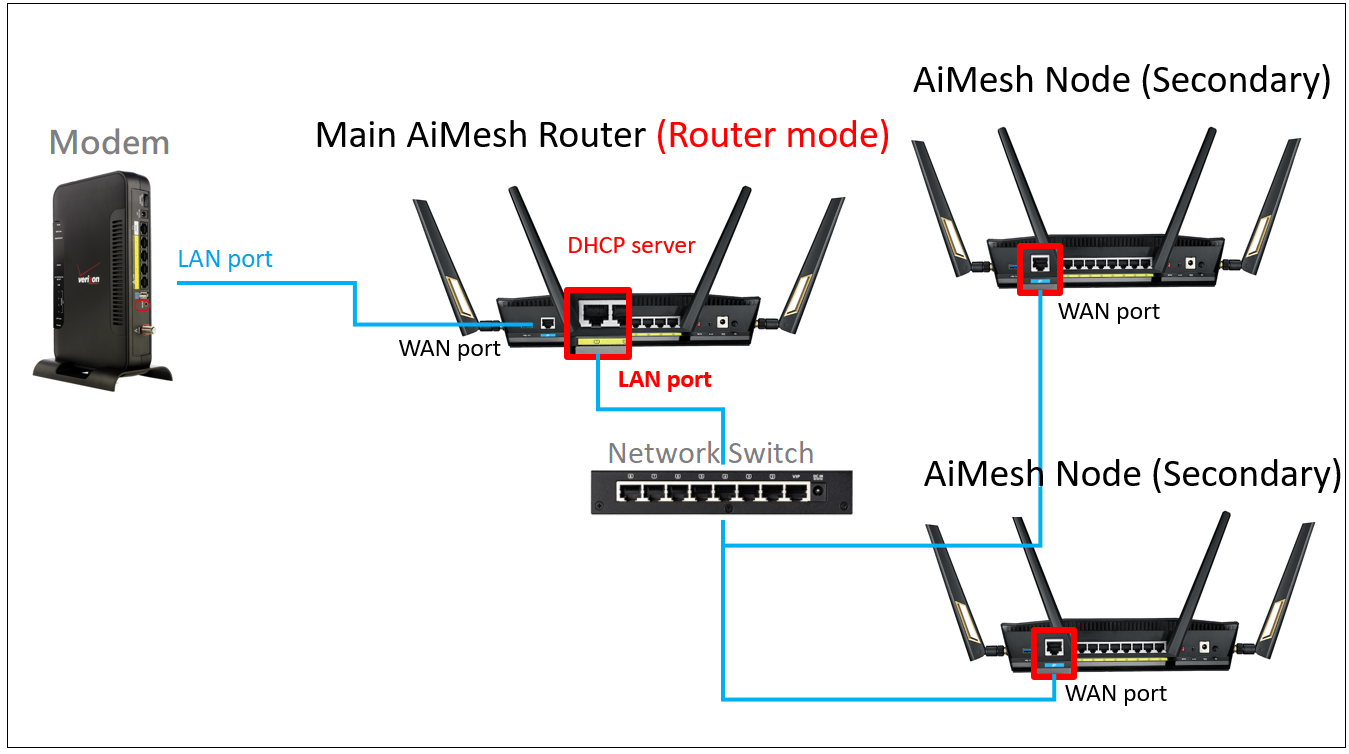
AiMesh] How to set up ASUS AiMesh or ZenWiFi Mesh Ethernet backhaul under different conditions ? (Advanced setup with network switch), Official Support

3 Ways to Set up Ethernet - wikiHow